Configuring system settings date, time, time zone and server name
The Kerio Control administration console allows the setting of a few basic parameters of the firewall's operating system.
Configuring date and time
Many Kerio Control features (user authentication, logs, statistics, etc.) require a correct setting of date, time and time zone on the firewall. Kerio Control allows manual settings or synchronization with an NTP server (recommended).

To configure date and time:
- In the administration interface, go to Advanced Options > System Configuration > Date and time settings.
- Select option Keep synchronized with NTP server.
Date and time can be set manually but it is better to use an NTP
server which provides information about the current time and allows automatic
management of the firewall's system time.
Kerio Technologies offers the following free NTP servers for this
purpose:
0.kerio.pool.ntp.org,1.kerio.pool.ntp.org,2.kerio.pool.ntp.org, and3.kerio.pool.ntp.org. - Click Apply.
Configuring time zone
Kerio Control enables easy management of times zones to avoid synchronization problems in various settings.

To change your time zone:
- In the administration interface, go to Advanced Options > System Configuration > Time zone settings.
- Select a time zone from the Server time zone list.
- Click Apply.
The current date and time will be changed according to the new time zone.
Configuring the server name
The default Kerio Control hostname is control.
If Kerio Control is not a member of a domain, the hostname will be only control. In this case, a problem could occur when using an older operating systems (e.g. Windows XP). Users cannot authenticate Kerio Control because the operating system is not able to read a one-word hostname. These operating systems need a hostname with at least two words separated by a dot (e.g. control.mycompany).
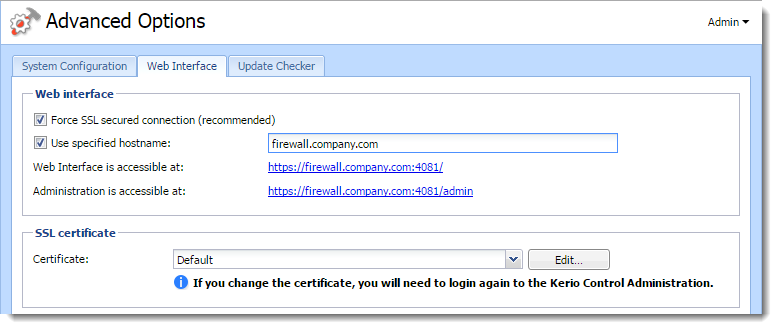
If you want to change the hostname, use the following steps:
- In the administration interface, go to Advanced Options > Web Interface.
- Select Use specified hostname and type a hostname (for example firewall.mycompany.com).
- Click Apply.
Configuring Hostname Settings
Kerio Control offers administrators the option to force hostname for clients connected via the Kerio VPNVirtual private network - A network that enables users connect securely to a private network over the Internet. for 2-step authentication. If this option is selected VPN Clients are redirected to an URL constructed from the hostname to verify the 2-step authentication.
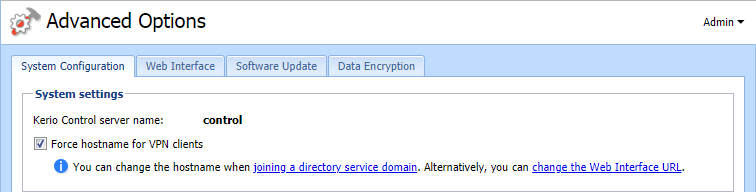
To force hostname for VPN clients:
- In the administration interface, go to Advanced Options > System Configuration >System settings.
- Check Force hostname for VPN clients.
- Click Apply.
NOTE
You can change the hostname when joining a directory service domain. Alternatively, you can change the Web Interface URL.