Configuring a routing table in Kerio Control
Kerio Control allows you to view and edit the IPv4Version 4 of the Internet Protocol. and IPv6Version 6 of the Internet Protocol. routing tables. Kerio Control works with the operating system's routing table as well as with the static routes created in Kerio Control.
To modify the routing table, in the administration interface, go to the Routing Table section. Note separate tabs for IPv4 and IPv6.
NOTE
If multiple Internet links are in network load balancing mode, Kerio Control displays only a single default route which is routed through the link with the highest link weight.
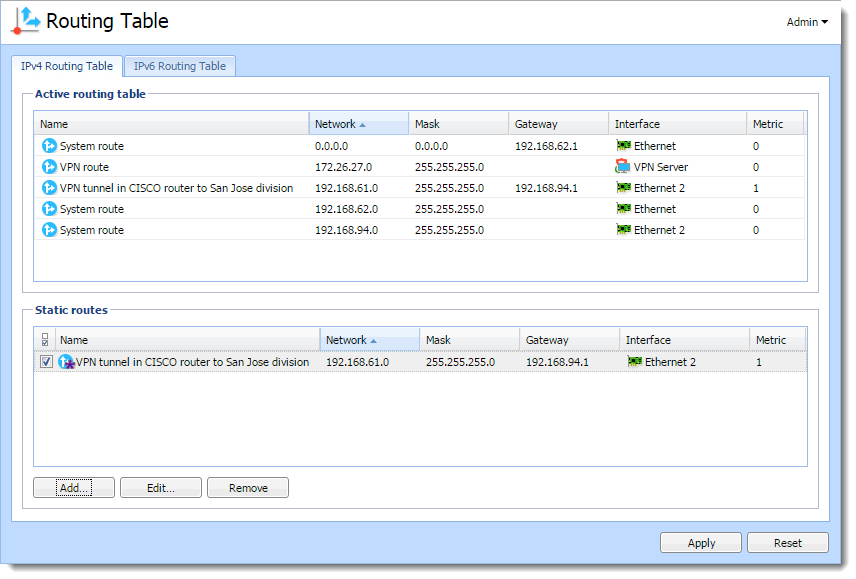
Route types
The following route types are available:
- System routes — These routes are downloaded from the operating system’s routing table. You cannot edit or remove the system routes.
- VPNVirtual private network - A network that enables users connect securely to a private network over the Internet. routes — These routes are visible in the table in the Interfaces column when tunnels are in the Up state. Kerio Control shows all routes configured in IPsecInternet Protocol security - A network protocol used to encrypt and secure data sent over a network. VPN tunnelKerio Control includes a VPN tunnel which allows to distributed offices to interconnect their offices securely. settings and all routes accessible behind the Kerio VPN tunnel. To create VPN routes, go to the Interfaces section, (See the articles Configuring IPsec VPN tunnel and Configuring Kerio VPN tunnel.).
- Static routes — Kerio Control saves static routes to the configuration file and adds them to the system routing table. You can add, modify, remove or temporarily disable these routes.
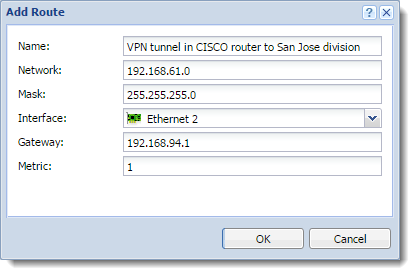
Modifying static routes in the IPv4 routing table
- In the administration interface, go to Routing Table > IPv4 Routing Table.
- Click Add.
- In the Name field, type the route name.
- In the Network field, type an IP subnet.
- In the Mask field, type a mask defining the subnet.
- In the Interface menu, select the interface.
- In the GatewayNetwork element that connects networks and shows packets where to go. field, type the IP addressAn identifier assigned to devices connected to a TCP/IP network. of the gateway (if necessary).
- In the Metric field, type the number that defines the route's priority.
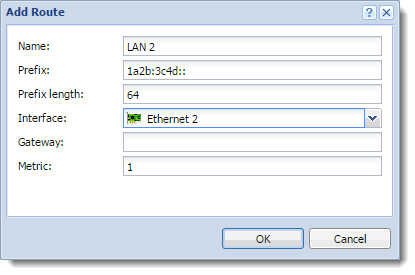
Modifying routes in the IPv6 routing table
- In the administration interface, go to Routing Table > IPv6 Routing Table.
- Click Add.
- In the Name field, type the route name.
- In the Prefix field, type an IP subnet.
- In the Prefix length field, type a prefix.
- In the Interface menu, select the interface.
- In the Gateway field, type the IP address of the gateway (if it is necessary).
- In the Metric field, type the number that defines the route's priority.