Configuring traffic rules - multihoming
MultihomingTerm for the internet interface which uses multiple public IP addresses. is a term used for situations when one network interface connected to the Internet uses multiple public IP addresses. Typically, multiple services are available through individual IP addresses (this implies that the services are mutually independent).
A web server web1 with IP addressAn identifier assigned to devices connected to a TCP/IP network. 192.168.1.100 and a
web server web2 with IP address 192.168.1.200 are running in
the local network.
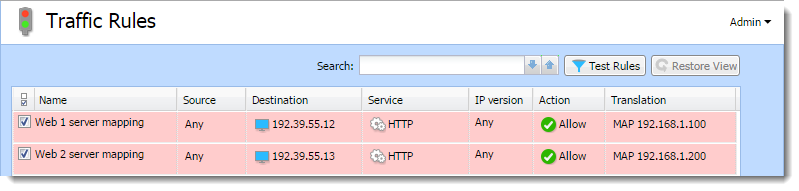
The interface connected to the Internet uses public IP addresses195.39.55.12 and 195.39.55.13:
- web1 to be available from the Internet at the IP address
195.39.55.12 - web2 to be available from the Internet at the IP address
195.39.55.13
The two following traffic rules must be defined in Kerio Control to enable this configuration:
However, you must add the public IP addresses to the interface first.
Adding IP addresses to an interface
To add the public IP addresses to the interface settings:
- In the administration interface, go to Interfaces.
- Select an interface and click Edit.
- Click Define Additional IP Addresses.
- In the Additional IP Addresses dialog box, click Add.
- Type the IP address and the mask. Add as many addresses as you need.
- Save all the dialogs.
- Click Apply.
Configuring traffic rules for multihoming
- In the administration interface, go to Traffic Rules.
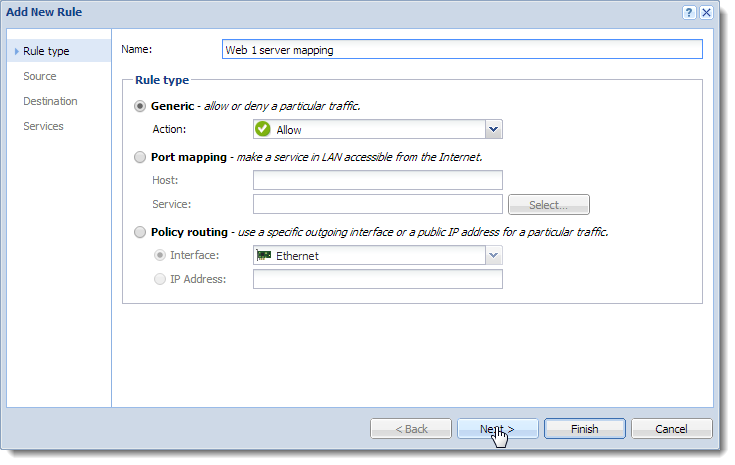
- Click Add.
- In the Add New Rule dialog, type a name for the
rule (in our example:
Web1 server mapping) and click Next.
- In the Source section, leave Any sources and click Next.
- In the Destination section, click Addresses. The IP address of the interface connected to the Internet must be added.
- Add the IP address of the interface connected to the Internet. Our example:
195.39.55.12. - Click Next.
- In the Service section, select HTTPHypertext Transfer Protocol - protocol for exchange of hypertext documents in HTML..
- Click Finish.
- In the
Web1 server mappingrule, double-click in the column Translation. - In the Traffic Rule - Translation dialog, select
the Enable destination NATNetwork address translation - A method that remaps IP addresses by changing network address information. option and type the IP address
of the corresponding Web server (
web1) to the Translate to the following host field. - Repeat steps 1-8 for Web2 server.