Creating Exchange ActiveSync accounts in Microsoft Outlook
You can synchronize your account with Microsoft Outlook 2013 and Outlook 2016 via Exchange ActiveSyncA protocol that synchronizes data with computers and mobile devices..
Due to the implementation of the Exchange ActiveSync protocol in Outlook, there are some usage limitations:
- You cannot synchronize your email filters from Kerio Connect Client.
- You cannot create additional contact, calendar, or task folders.
- Global Address List does not synchronize to Outlook.
- You cannot share any folders.
- You cannot see contact groups created in Kerio Connect Client.
- You cannot rename or delete calendar and task folders created in Kerio Connect Client.
- You cannot synchronize your drafts and notes, or task status.
- Delivery and read receipts do not work.
- You cannot set the out-of-office message.
NOTE
To avoid these limitations, you can use Kerio Connect Client instead. For more information refer to Kerio Connect Client.
Creating an Exchange ActiveSync profile
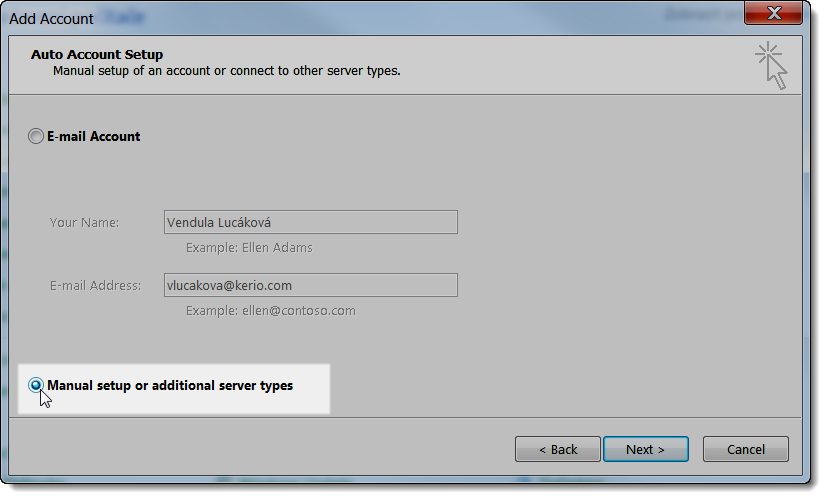
To create a profile for Exchange ActiveSync in Outlook:
- Go to Windows Control Panel > Mail and click Show Profiles.
- Click Add, enter a name for the profile, and confirm.
- Select Manual setup or additional server types, and click Next.
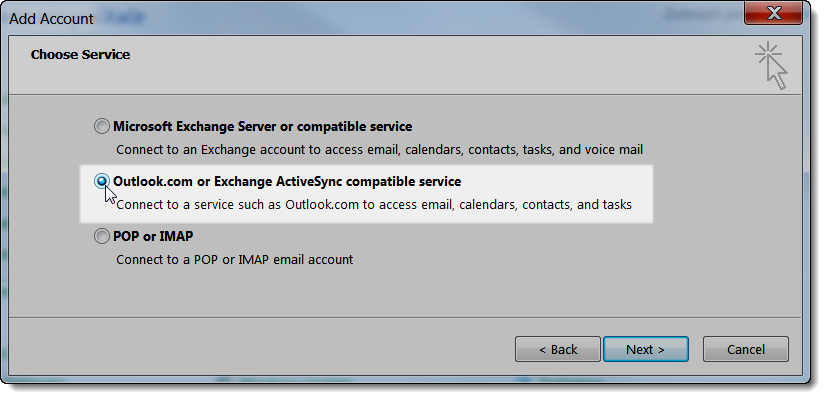
- Select Outlook.com or Exchange ActiveSync compatible service, and click Next.
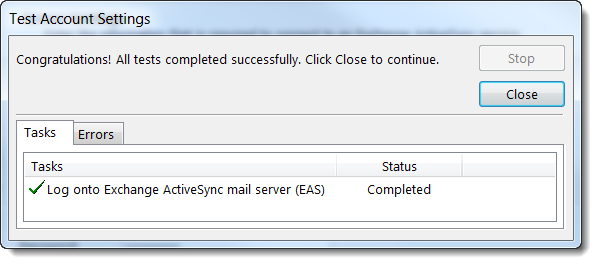
- Type the user, server, and login information, and click Next. If the user is not from a primary domain, the username must include the domain (for example,
jsmith@company.com).

- When Outlook completes the test connection, click Close.
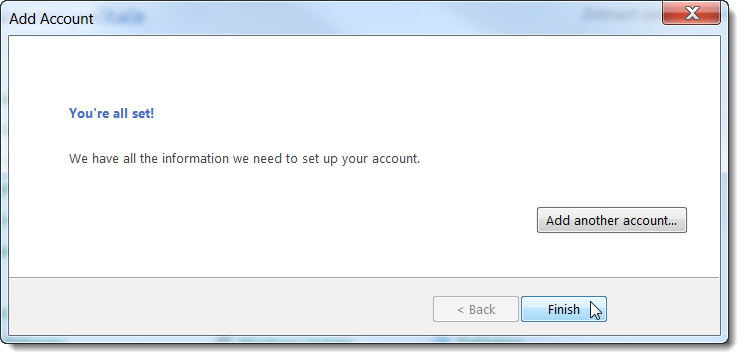
- Click Finish.
Accessing the free/busy information
To see your the free/busy availability information of invitees, configure the free/busy URLUniform Resource Locator is the address of a web page on the world wide web. in Microsoft Outlook:
- In Outlook, go to File > Options > Calendar > Free/Busy Options.
- Type your calendar address in the Search location field in the following format:
https://<_server_address>/freebusy/%SERVER%/%NAME%. For example,https://mail.feelmorelaw.com:443/freebusy/%SERVER%/%NAME% - Save your settings.
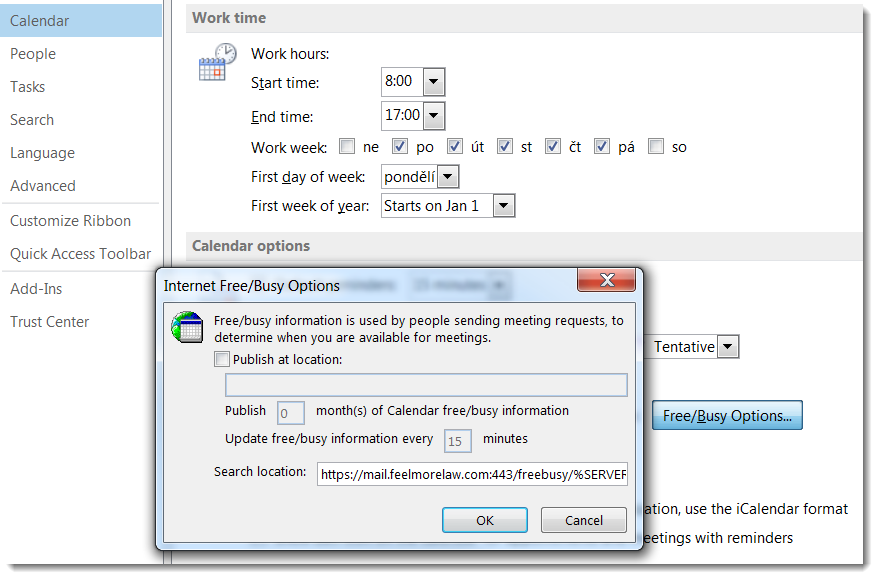
Now you can see the Free/Busy information for all users when creating meetings.